Prevent your grass and plants from being trampled on and dying. By making a gravel path through your yard and garden, you can guide foot traffic while enhancing the newfound elegance of your greens and flowers.
gardeninginfo-online.com assembled the following information and tips to help you lay a budget-friendly, easy to install gravel path.
How To Make A Gravel Path
The following steps will guide you through the easy process of installing a gravel path:
Step 1: Plan Your Gravel Path
When planning your gravel path, consider the following:
- Where will your path be from start to finish?
- How wide will your path be?
- How deep will your path be?
- What is your budget for this project?
When planning the route of your path, you can use strings tied to stakes or marking paint. Be mindful to avoid sharp inclines and areas prone to washout during severe weather.
When calculating how much gravel you will need:
- multiply the path length by the path width (in feet)
- multiply that number by the depth you have determined for your gravel (in inches)
Or, visit klsupplies.com/calculator for an easy to use calculator that will give you the amount of gravel you will need in cubic yards.
Tip: Don’t underestimate the amount of gravel needed for your path. In fact, you will want to overestimate by one or two feet (length) to have extra gravel for eventual repairs to your path.
Note: Depending on the gravel you choose, recommended depths will range between one and three inches. That’s two inches of crushed stone for the base and +/- two inches of gravel for the surface.
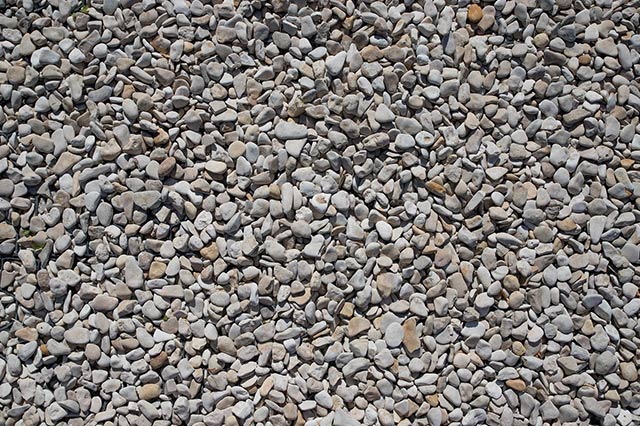
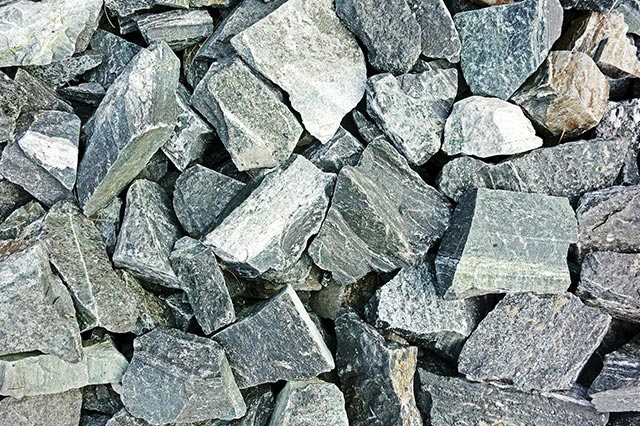
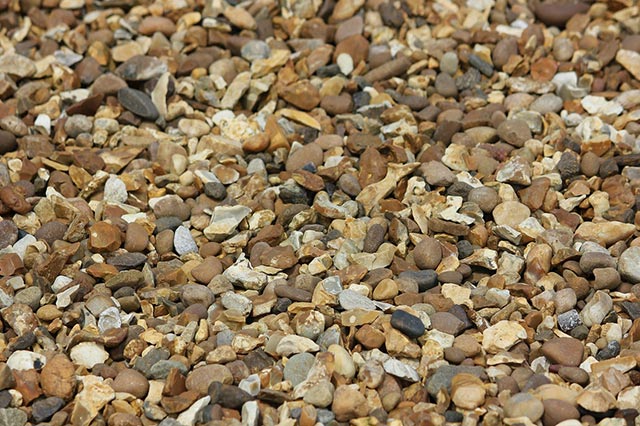
Step 2: Choosing Gravel for Your Path
The varieties of gravel color and size to choose from are almost limitless. 16mm gravel is recommended for creating a flat, smooth, and comfortable walkable surface.
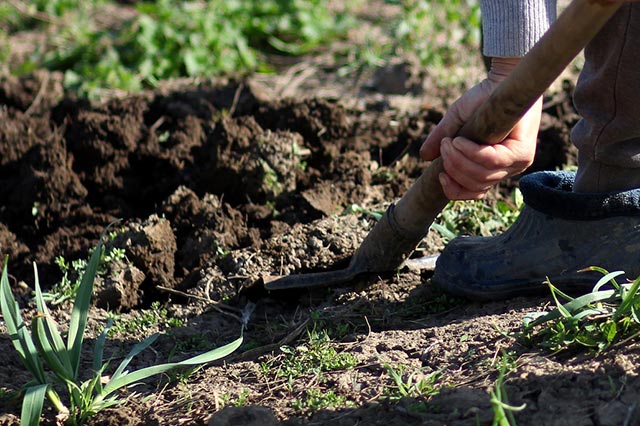
Step 3: Dig The Trench for Your Path
Using a square edge shovel, remove the topsoil in the areas you have marked off for your path. Observe the following as you trench your path:
- Dig your path’s area to a depth of about four inches (As you are digging your trench, remove and dispose of any weeds you come across)
- The edges of your trench should be straight and even
- Flatten the bottom of the trench using a rake
- Compact the trench using a motorized or manual tamper
Note: Compacting the trench will help prevent the formation of potholes or sagging areas as your path ages.
Tip: When compacting the trench, you may need to add soil back to maintain an even depth along the path area.
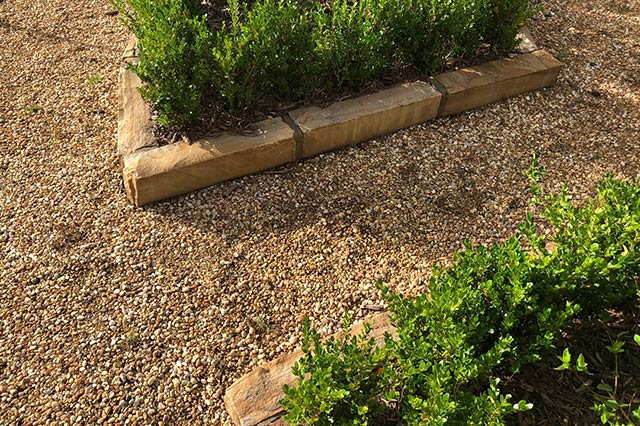
Step 4: Path Border Installment
The border for your path will contain the crushed stone (next step) and gravel within the area you have chosen for the path. The following work well as path borders:
- Stones (almost any stones can be used as a border, fit them tightly for a seamless appearance)
- Bricks (set bricks upright, at an angle, or flat in the ground)
- Wood (use treated wood cut into sections and held in place with stakes every three to four feet)
- Metal Edging (you can find steel or aluminum metal edging painted in various colors)
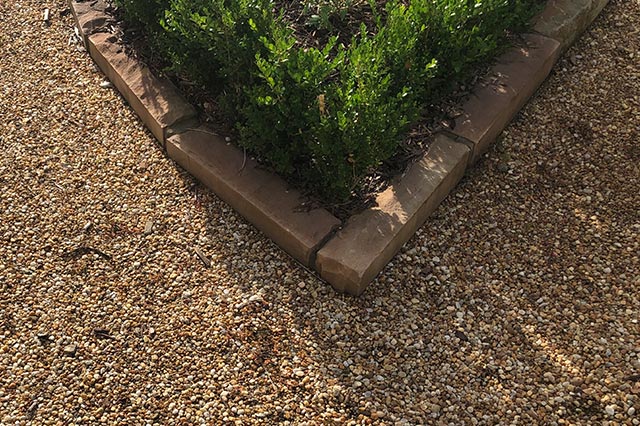
Your borders should extend continuously from end to end of the path, and evenly on both sides.
Tip: Use a piece of wood measured and cut to the desired width of your path, between the borders, to keep them evenly spaced along the path.
Step 5: Add Crushed Stone
This simple but essential step adds further stability to your path by creating a solid foundation for it. Once you have compacted the soil in the path, add a two-inch layer of crushed stone along the area of the path. Make sure the crushed stone is level and compacted before moving on to the next step.
Step 6: Lay A Membrane Along Your Path
By laying a permeable, weed resistant membrane on the crushed rock along your path, you can:
- Allow water to easily drain from your gravel
- Prevent weeds or grass from sprouting through your gravel
- Prevent gravel from mixing with the crushed stone and soil beneath it
- Slow the effects of water erosion
To install the membrane:
- Lay it along the path (cut pieces to fit curves)
- Overlap pieces by four to six inches
- Trim edges to fit within the path
Tip: When overlapping sections of your membrane, the piece on “higher ground” should be placed over the piece on “lower ground.” Overlap in the direction that water flows from the where you are installing the path. This will help water flow away from the path rather than accumulate beneath it.
Watch this descriptive video about laying a membrane
Step 7: Add Your Gravel Surface
Now that your membrane is in place, you can add the gravel to your path. Observe the following:
- If you are installing “stepping stones,” they should be in place before adding your gravel
- Shovel the gravel in to place and smooth evenly with a rake
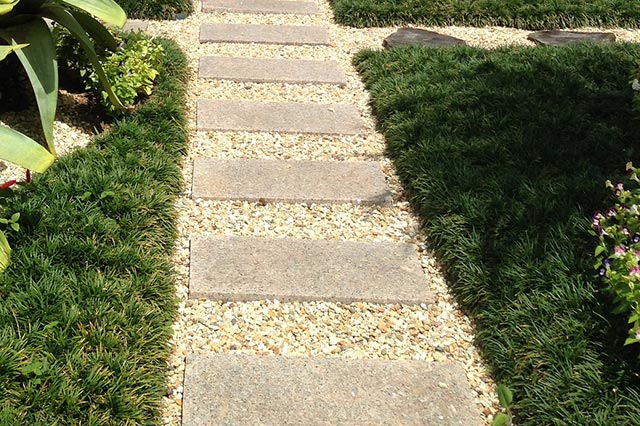
There is no need to compact your gravel, as it will settle into place on its own.
Tip: If you have installed stepping stones, your gravel should be level with the stones. Under or overfilling between the stones may create a tripping hazard.
Gravel Path Maintenance
Over time, nature, weather, wildlife, and people may damage your gravel path. The following will help you keep it looking pristine:
- Weed or pull any grass that may sprout within your path
- Apply an herbicide to areas of your path experiencing frequent weed or grass growth
- If potholes or depressions develop in your path, correct them by widening the area by a few inches and adding new gravel to it
- Add gravel whenever it is lost in storms or other events
Like any other feature in your yard or garden, the more attention you give it, the better it will look, and the longer it will last.
Gravel Path Project Tools
The tools you will need to install a gravel path include:
- Marking paint or string with stakes
- Square edge shovel or spade
- Wheelbarrow
- Metal rake
- Manual or automatic tamper
- Scissors or a utility knife
You will also need a good pair of work gloves, and a saw to cut wood used for spacing and/or borders.
Your Gravel Garden Path
In this article, you discovered information and tips to help you easily install a gravel garden path.
By installing a gravel garden path, you can avoid trampling your plants and grass while enhancing the elegance of your yard and garden.
Without a gravel path, you, your family, and your friends may inadvertently cause your grass and garden to develop ugly dead spots from constant foot traffic.
Sources:
sonomamg.ucanr.edu/Sonoma_Gardener_Articles/Hardscape/
gardeningsolutions.ifas.ufl.edu/design/outdoor-living/walkways.html
johnson.k-state.edu/docs/lawn-and-garden/in-house-publications/garden-design/Down%20the%20Garden%20Path.pdf
uwsp.edu/cnr-ap/UWEXLakes/Documents/ecology/shoreland/paths_and_walkways.pdf
The post How To Make A Garden Path with Gravel appeared first on http://gardeninginfo-online.com.
No comments:
Post a Comment